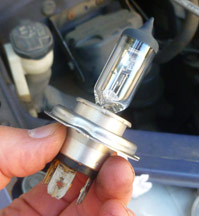
I cruised the web and found only some pretty poor descriptions and videos of how to do this. I thought I'd save others the trouble of the same frustration I went through in figuring it out, and write this up right.
My 1997 RAV4 is a 4 cylinder 2.0 liter 4 seater. It's got original equipment for the headlights. My lights have a single bulb which handles both the high beams and also the regular lights. It looks like different filaments within the bulb are at different levels and give you the two different modes. I replaced my standard headlamp with another standard headlamp (I hate those high intensity lights which blind oncoming cars - they're rude and unsafe for the other driver, and on a two-lane road they're dangerous for you and the other driver both). I spent $12 for my replacement bulb, at O'Reilley Auto Parts in Santa Cruz.
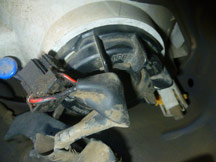
Pop the hood, look at the back side of the headlight and this is what you'll see. The black outer flange is hard plastic and has 4 fins on it which you can see in this photo. They're at approximate clock positions 9am, 11am, 12, and 1pm here. This flange unscrews as a normal right-hand screw - just grab it with your hand and turn it counterclock wise. It'll be free after about 1/4 turn. Pull it free and let it hang on the black covered wires. |
This now gives you better access to the black plug which mates to the bulb assembly. The black plug simply pulls off the electrical tabs (3 of them, see center of next slide). There's no clip here - the black plug just press-fits onto the 3 electrical tabs. You may pull it off with your hands. Mine was a little greasy, and it helped to grasp it with these pliers and then it came out with very little force. Don't crunch the plug by grasping it too hard. |
The plug is now pulled off the electrical tabs. |
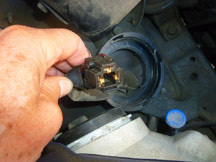
Now you're looking at the back side of the bulb assembly at the center of this picture, with its 3 electrical tabs. Next, you need to pull off the soft rubber boot which protects the bulb assembly from the weather. |
The black plug into which the wires go, and which connects onto the electrical tabs on the bulb assembly. In the background, behind the plug, is the black outer flange mentioned in slide #1, now you can see the inner side. |
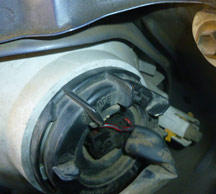
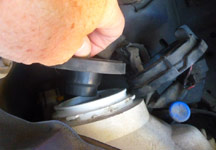
The boot has a tab on its top side which you can grasp with thumb and forefinger and gently ease off the white ceramic housing of the headlight assembly, using all your fingers to avoid tearing it if it's been on there a while. Now the clip holding the bulb assembly will be easy to see. You'll have to get your head just right to be able to see the clip, and use a flashlight. |
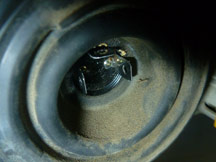
Now the clip holding the bulb assembly will be easy to see. You'll have to get your head just right to be able to see the clip, and use a flashlight. The clip is a flexible bent wire which is anchored on one side and the other end fits under an indentation. The clip holds in the bulb assembly. The bulb assembly has a flat flange which mates up against the housing so it cannot simply disappear into the headlight cavity, and the clip is what keeps this flange snug. With your finger, simply press on the one end in the indentation to free it, and free the bulb. In the photo, the clip end indentation is at the 3pm position, on the right side of the bulb flange. |
Replace the bulb, and reverse the previous steps. Be sure not to touch the glass part of the bulb assembly as the oils on your hand will shorten the life of the bulb. I didn't need to wear any special gloves - there's plenty of meat on this bulb assembly which is not glass so with a little care you should have no trouble avoiding touching the glass.
When I switched on the headlights, it worked like a charm first time. Good luck!